Welcome to the ScrumpliCity Guide!
The ScrumpliCity guide provides you with all the important information about the game, detailed step-by-step instructions for your role as a tutor and joining instructions for learners. Further information on the Scrum process, which is not listed here for reasons of clarity, can be found at scrum.org.
Introduction
ScrumpliCity is an ideal first project to better understand and practically apply the Scrum process. Learners build a paper city from prefabricated crafting templates, while the website guides them step by step through the various phases. Work is carried out in teams that are organised together in a room. A room therefore brings together several project teams—for example, a school class divided into four teams.
Prerequisites
Each team needs a laptop for the game. The learners use this to join the room and manage their user stories. As ScrumpliCity does not include a product backlog, teams will need to manage this externally—for example in an online tool or in the traditional way using sticky notes. The teams don't need glue to build the paper city, but they do need scissors and optional coloured pencils to customise the result. You can find more information about the crafting templates in the instructions in the downloadable .zip folder.
Scrum content
The game starts with the first sprint planning. Firstly, the teams determine a name for the sprint, then define a sprint goal and finally their user stories. These are estimated with story points by the learners, assigned to a team member and expanded with acceptance criteria in the description. During the construction phase, learners can view their user stories by clicking on them in the detail box and marking them as ‘completed’. In the sprint review, the product owner checks the completed tasks—the velocity is updated automatically. The sprint completion is the transition phase between two sprints. This is where the learners decide whether user stories that have not been accepted should be discarded or carried over to the next sprint. Accepted stories are automatically archived. Finally, the learners should update the physical burn-down chart, which you can download together with the crafting templates!
Step-by-step guide for tutors
Step 1: Role selection as a tutor
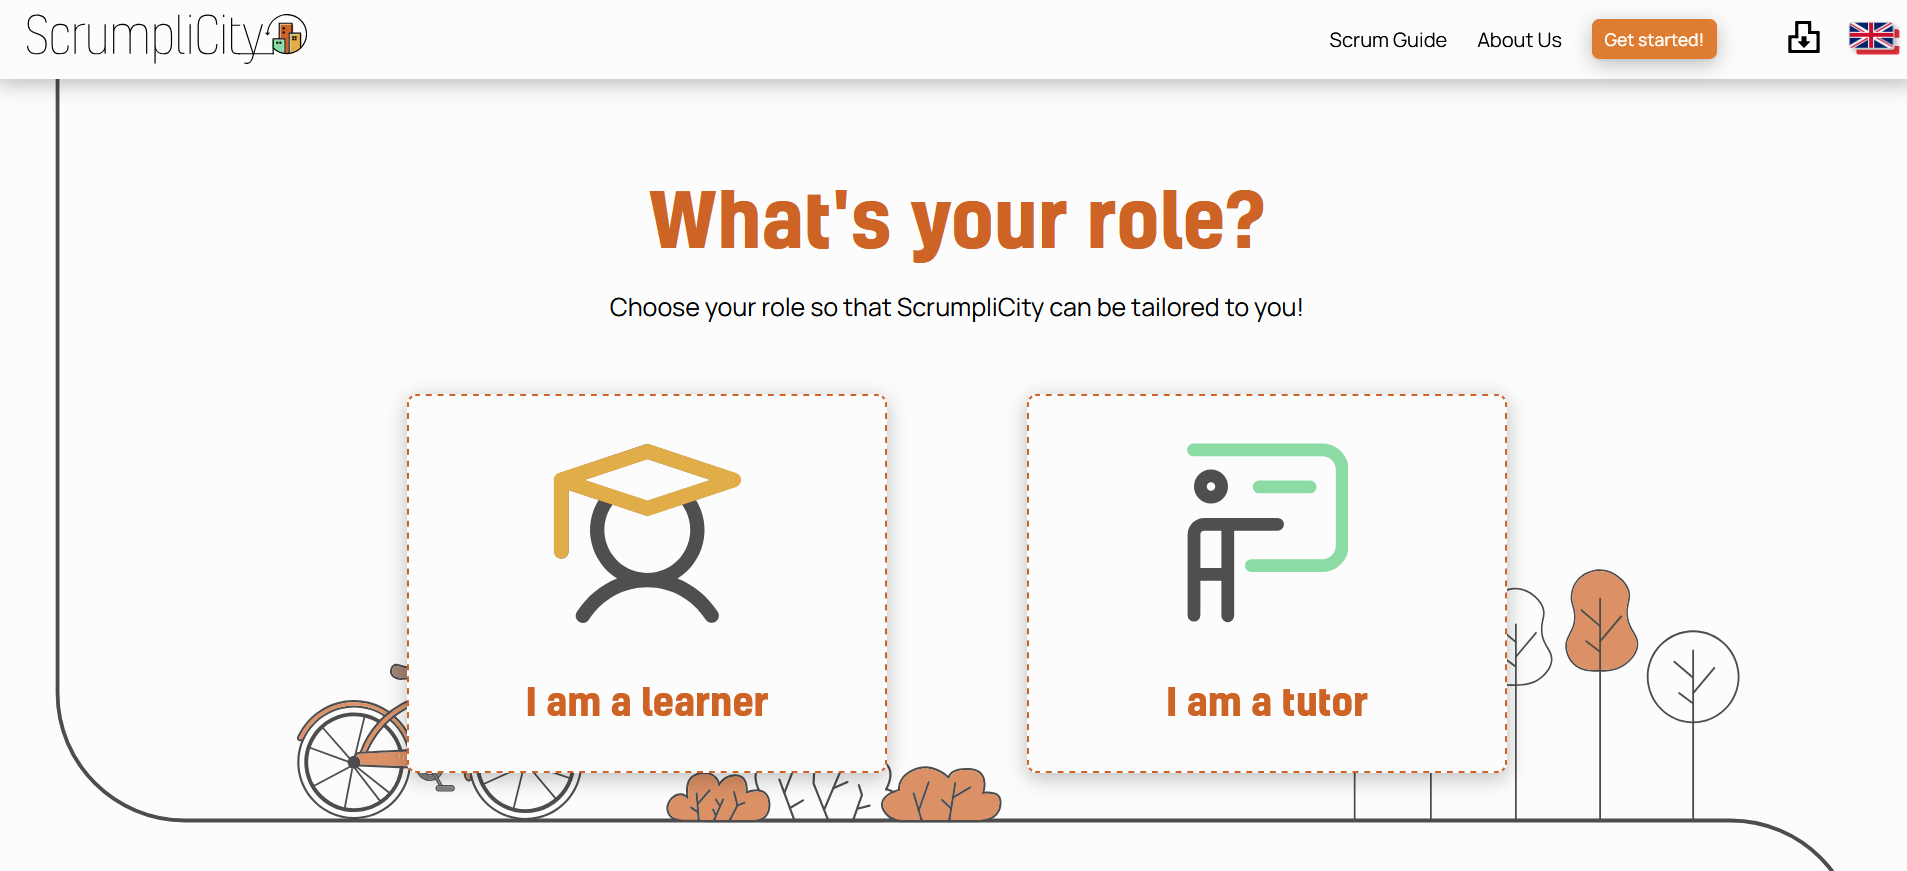
1. From the homepage, you can access the selection page via the ‘Get started!’ buttons. The ‘Tutor’ role takes you to the login page, which is currently only possible with an existing Microsoft account. If you select the ‘Learner’ role, you will be redirected to the room code entry page so that you can then play as a team.
Step 2: Room overview of the tutor
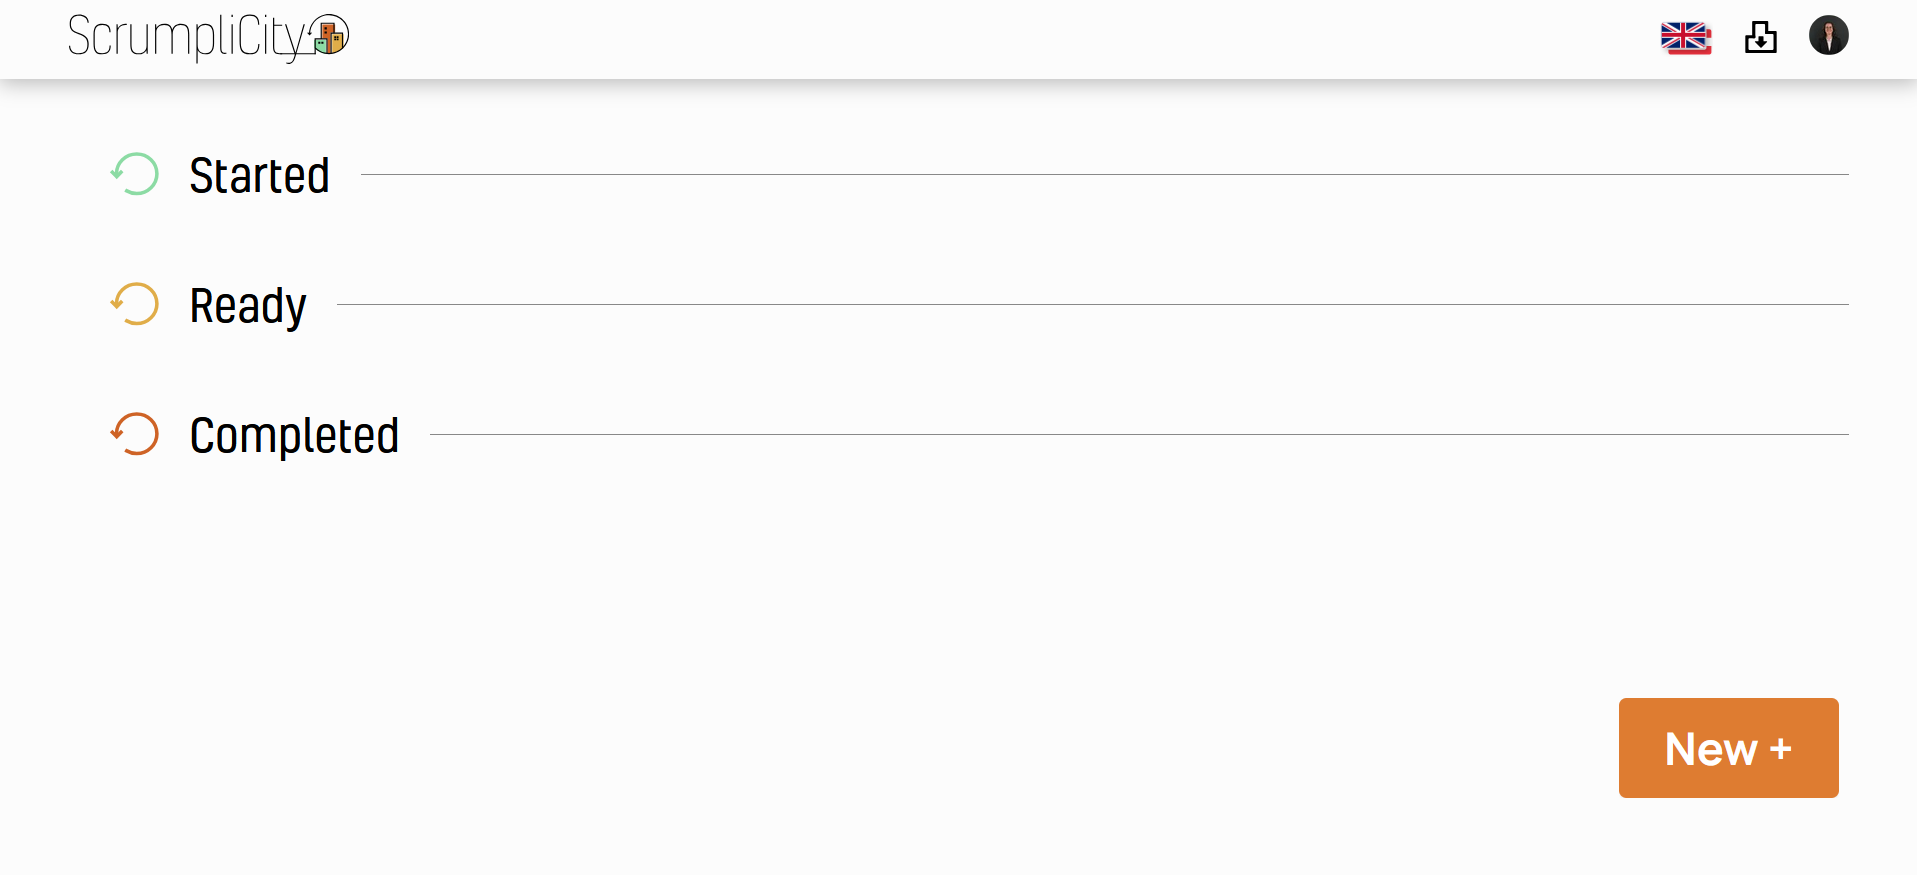
2. Once you have successfully logged in, the website will automatically redirect you to the room overview. In the header, you have the option of changing the language from English to German, downloading the crafting templates or expanding the profile settings. To play ScrumpliCity, you must create a new room at the bottom right.
Step 3: Create room with name, number of sprints and phase duration
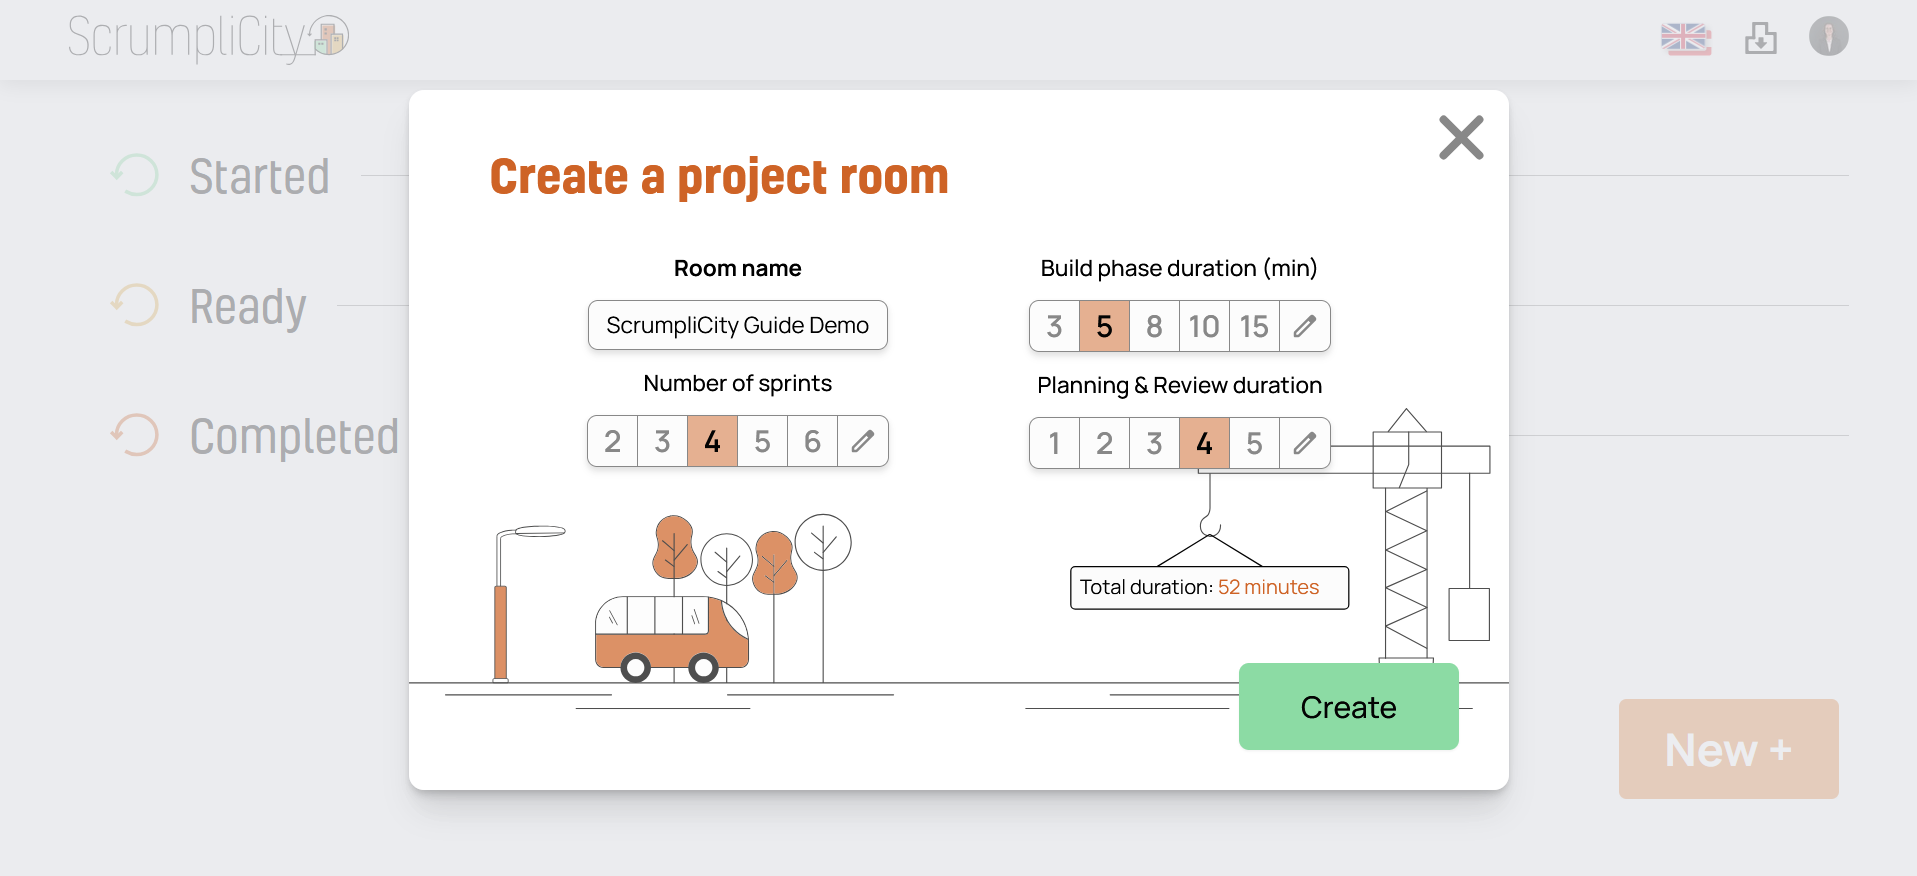
3. You can configure numerous settings when creating a room. You can change these again later on. The name of the room is only displayed in the room overview to make the room identifiable. You can also set the duration of the various phases, either with suggestions or your own input (up to 99 minutes). The total duration of the game is also displayed at the bottom right to make it easier to plan.
Step 4: Download crafting templates via the icon
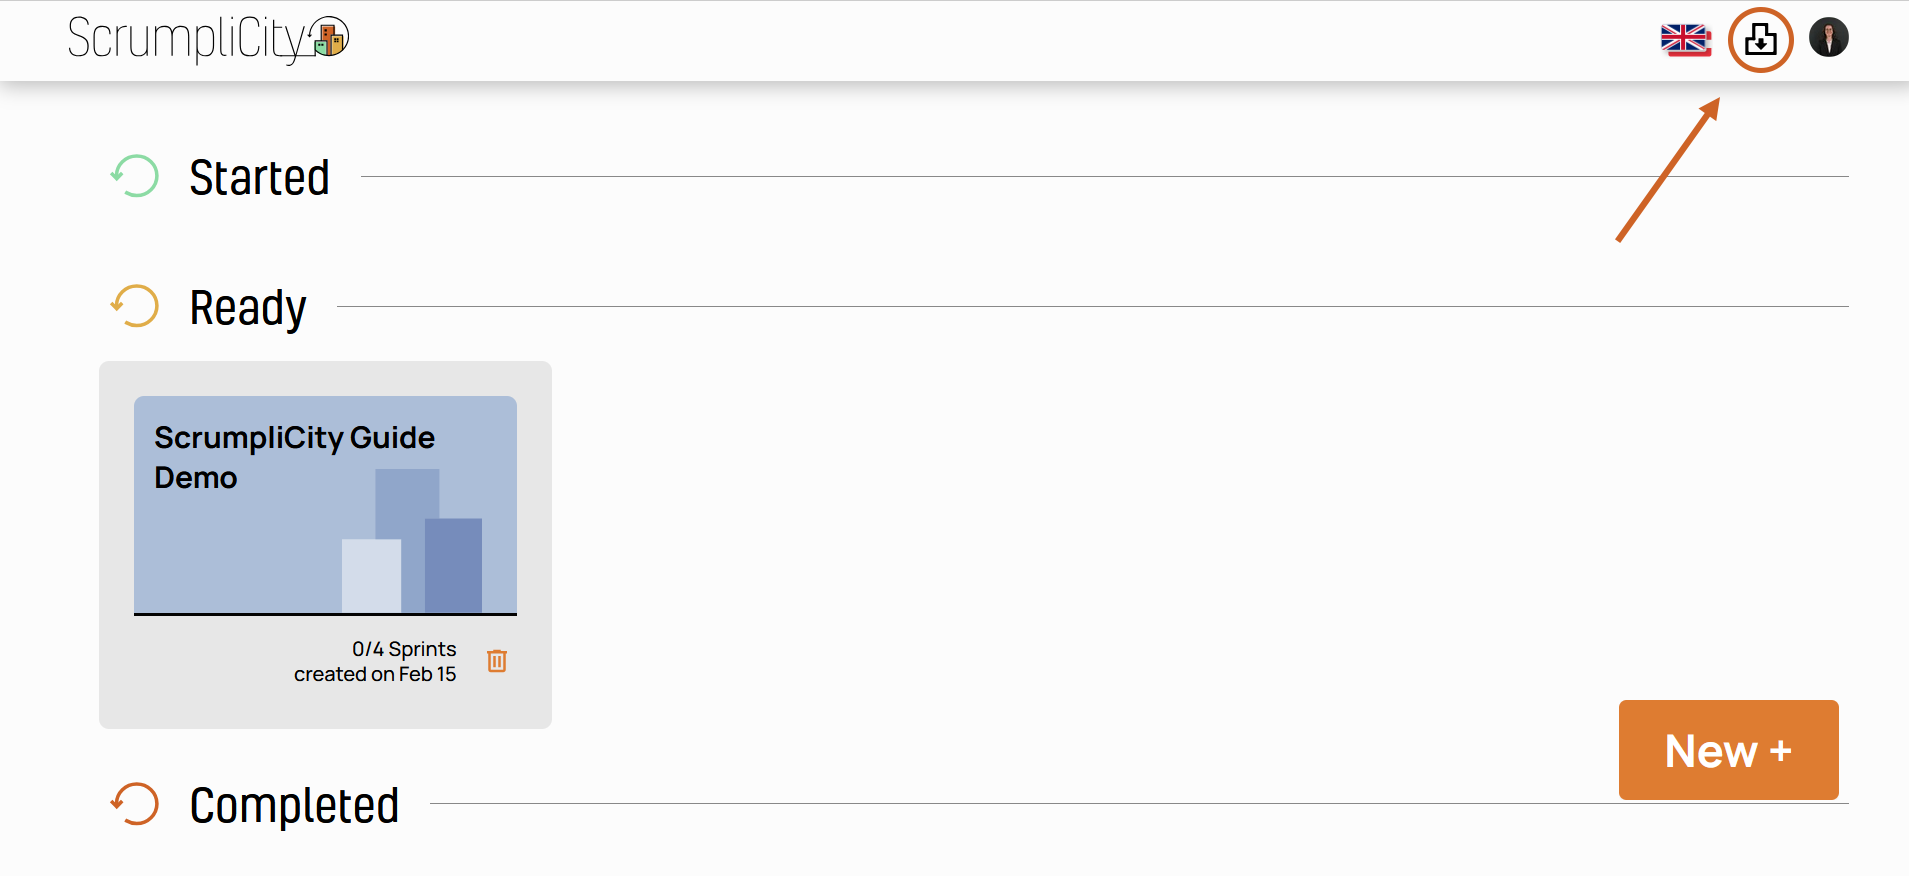
4. Now that a room has been prepared for playing, we recommend downloading the crafting templates by clicking on the centre button in the top right-hand corner. In the .zip folder you will find template sheets, a template for a burn-down chart and instructions with useful information, such as the required number of printed sheets per team.
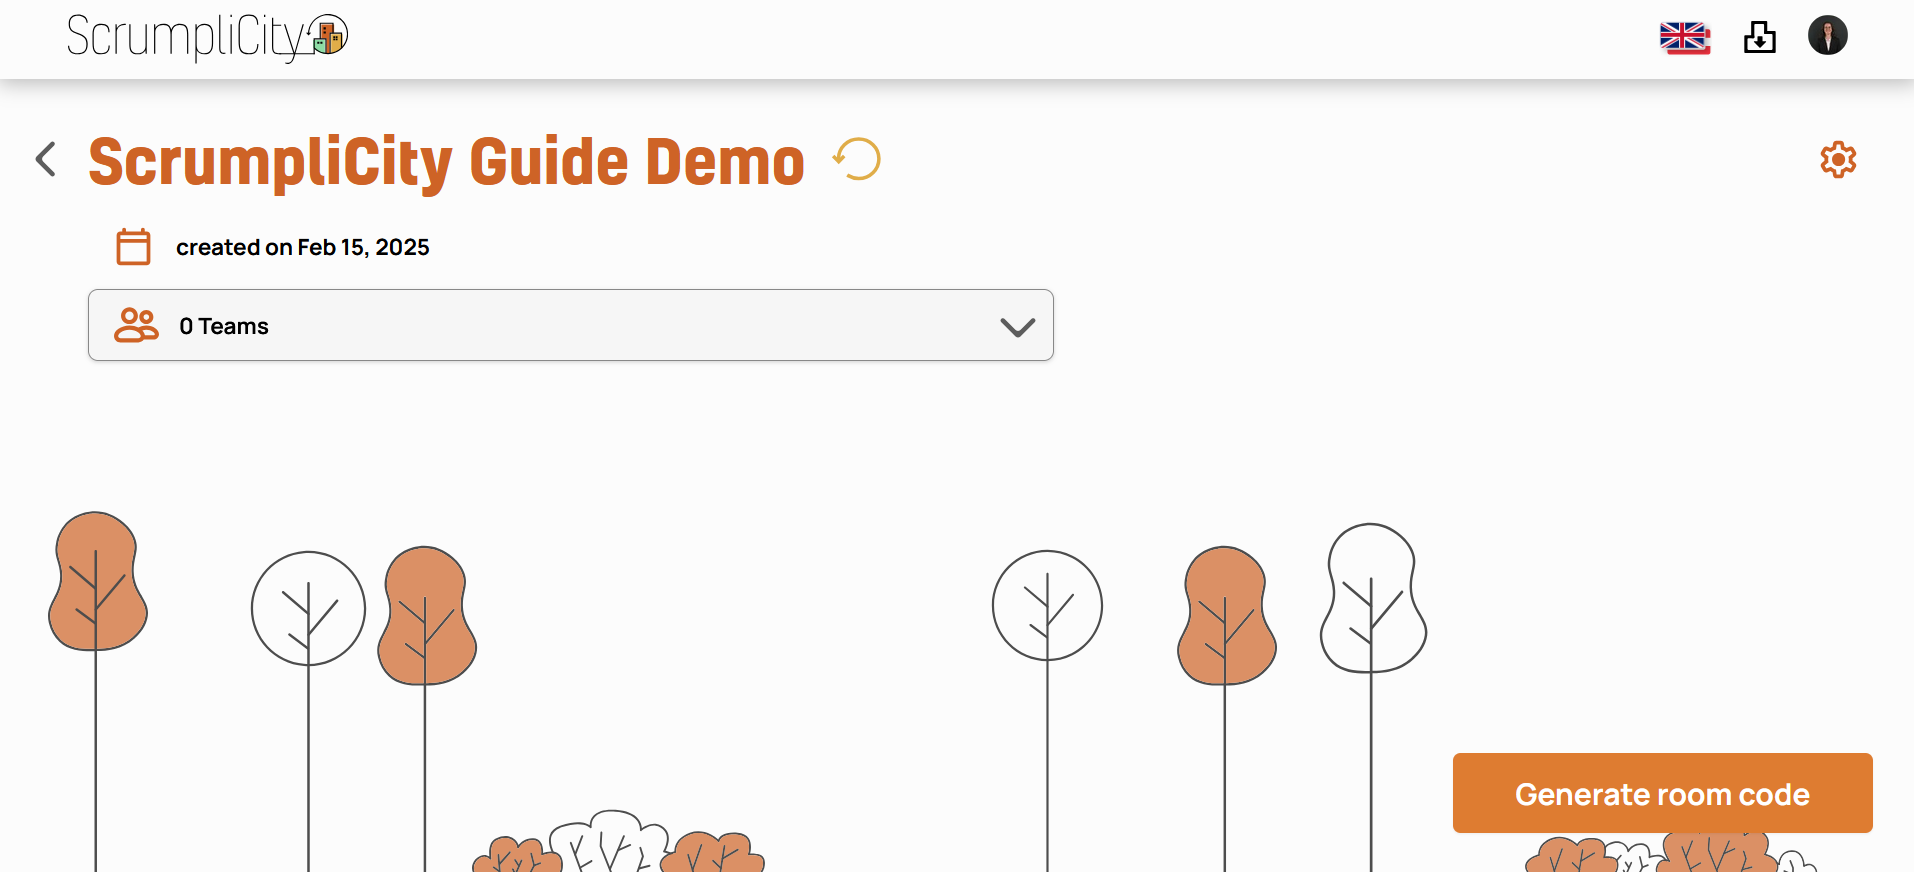
Step 5: Manage your room on the management page
5. Click on the room to go to it's management page. This is where you are as a tutor while the game is running. You can adjust the room settings at the top right. Before the game can be started, you must generate a room code at the bottom right. The code will open in a new window so that you can easily project it onto another screen. Using this code, learners can join the room on scrumplicity.app/play.
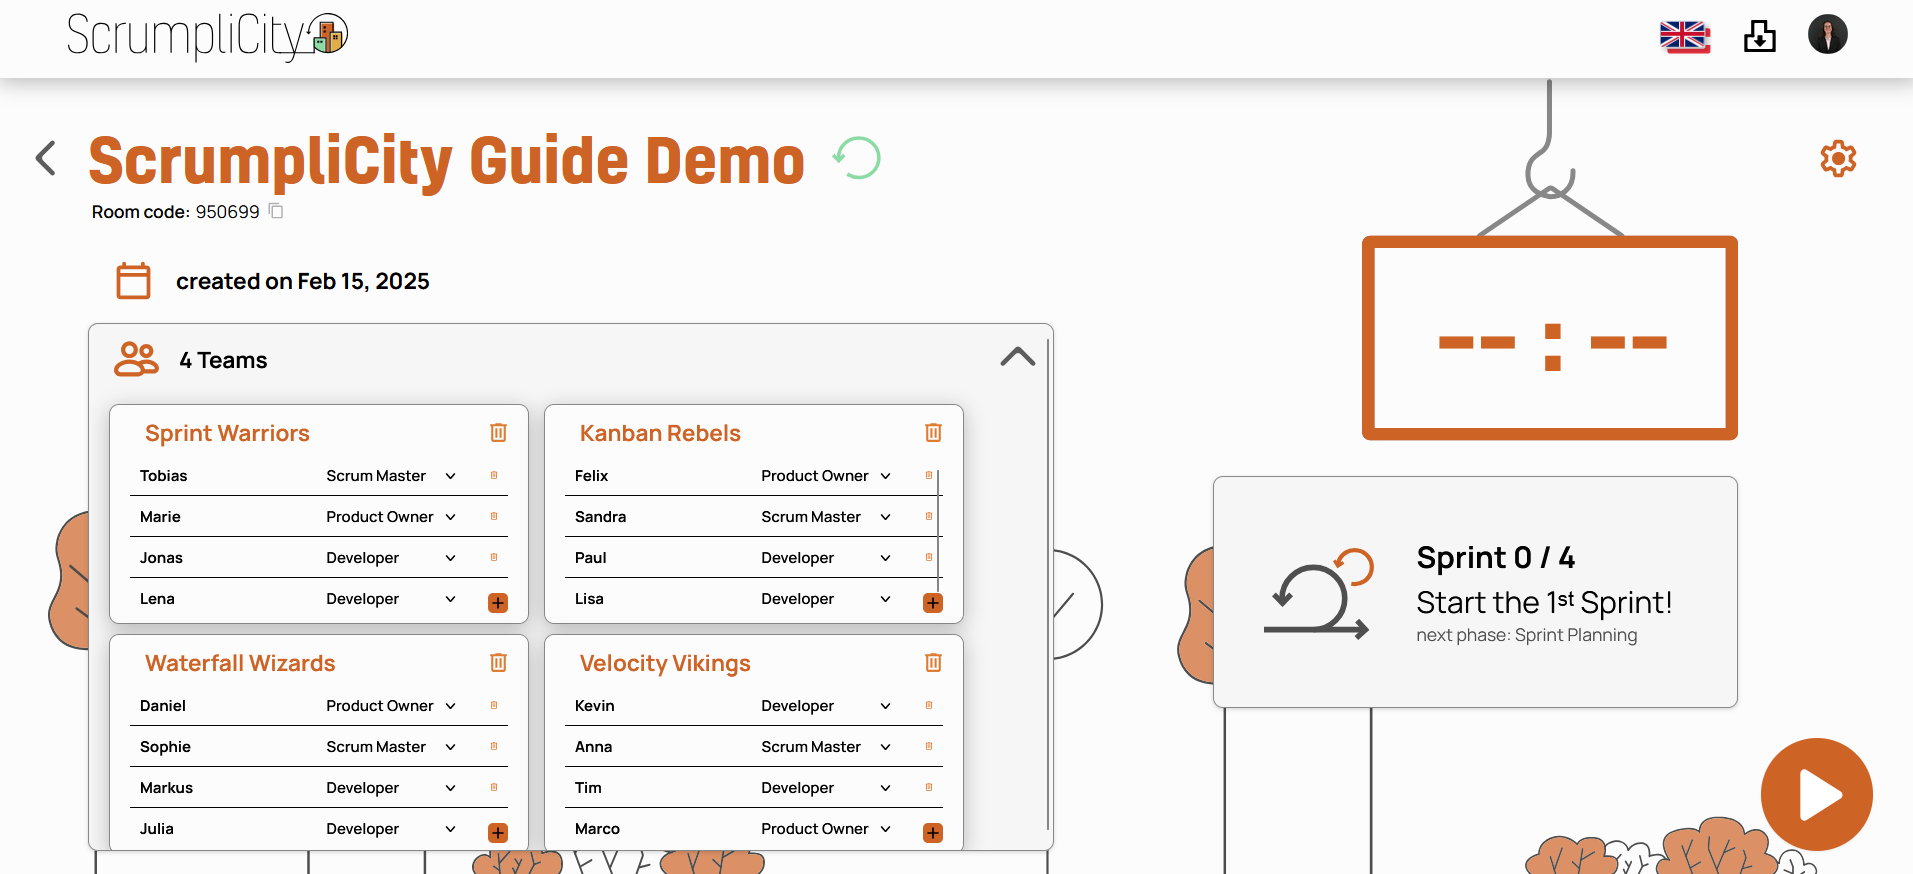
Step 6: Manage your teams and start the game!
6. As soon as a room code has been generated, you can also copy it to the clipboard under the room name. An empty timer and the display for the current phase and sprint number will also appear. Once at least one team has joined, you can start the game by clicking the ‘Play’ button at the bottom right. As a tutor, you can delete teams or add or remove members, but remember to pause the room first.
Joining instructions for learners
- Enter room code
- Set a team name
- Add team members and assign roles
- Complete the registration and wait for the tutor to start the game!